How to scan documents into PDF files on iPhone. Being requested to sign, scan, and email a document may appear to be an impossible chore if you do not own one of those fancy all-in-one printers that also has a scanner.
Not to mention a duty from a decade ago. On the other hand, you might already have a scanner at your disposal: your iPhone or iPad.
When I say “scanning a document,” I do not mean taking a picture of it and then editing it; doing so would require more effort than the benefit it would provide.
It is recommended to use the document scanner that is tucked away in the Notes app on the iPhone. In 2017, Apple released iOS 11, which included the capability, but if you don’t make use of Apple’s Notes app, you won’t be aware that it’s there.
I’ll walk you through finding the scanner, how to operate it, and some general suggestions for making the most of the hidden function in the following paragraphs.
How to scan documents into PDF files on iPhone 2024
Put the document or documents down on a level surface that is in a well-lit area. Launch the Notes application, then select either “New Note” or “Open Existing Note” from the menu.
I’ve scanned a bunch of stuff, so I made a folder on my computer called Scanned Documents where I can put it all and easily find it again.
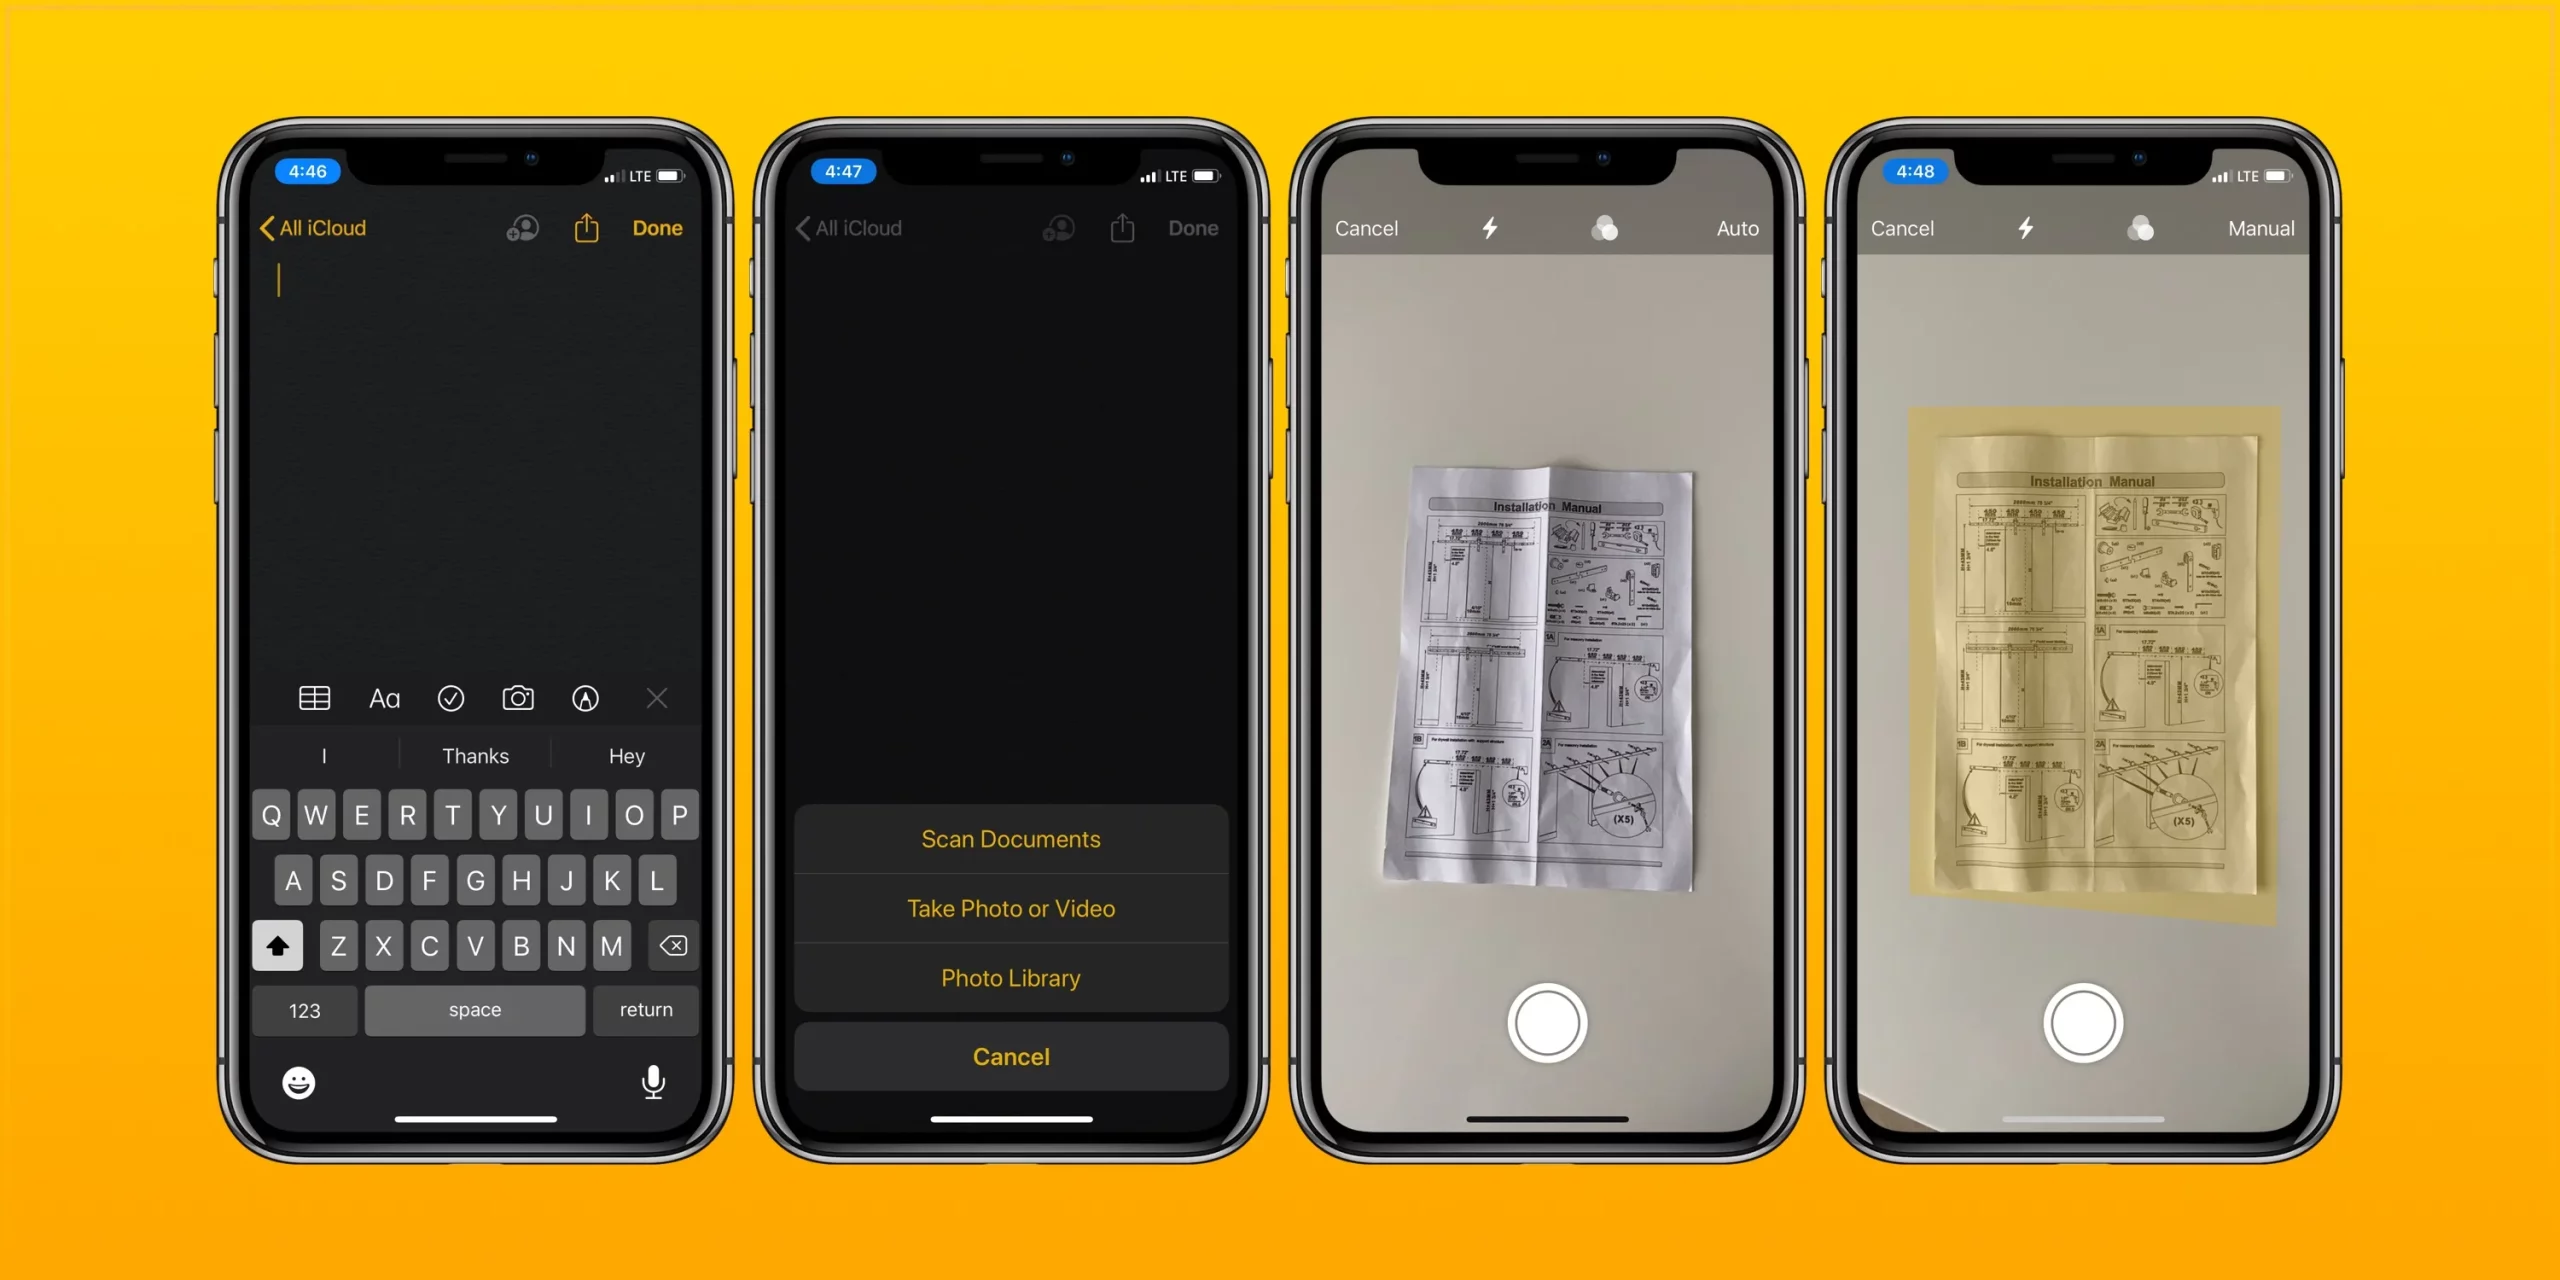
To scan a document while a note is open, tap the camera icon, and then tap Scan Documents.
When you bring up the camera on either your iPhone or iPad, you’ll notice a shutter button located towards the bottom of the screen.
Do not push it just yet; instead, adhere to the directions that are displayed on your screen. Hold your smartphone so that it is directly over the document to achieve the best possible results.
As soon as the camera starts scanning and searches for the document, a yellow box will show on the screen.
As your smartphone searches for the sides and corners of the paper, it will provide you with helpful hints such as “move closer.”
After it has determined that the whole document has been presented, it will commence an automatic scan. You can try pressing the shutter button again if your iPhone is still having trouble finding the document.
The bottom-left corner of the screen will display a thumbnail image of each page, and the scanner window will remain open so that you can continue scanning other pages. When you’re done, tap Save.
Make adjustments to get the perfect scan
After you have scanned the document, you will have the opportunity to make modifications, such as defining the corners if the scan wasn’t quite accurate, altering the color scheme, rotating the paper, or adding additional pages.
You may open the document by tapping on it, and all of the editing tools will be along the bottom of the screen in the section that opens up.
If you do not want that information to be included in the document, you may either use the crop tool to modify the corners or clip off a piece of the text.
To utilize the crop tool in the simplest and most efficient manner, place your finger in the vicinity of the small circle that can be found in each of the four corners of the page.
These circles also serve as magnifying glasses. Instead of hiding the effects of your tweaks, this will highlight them more clearly for you to see.
Sign, share or save your scanned document
You now have a document that has been scanned and edited, so you may choose between a few different possibilities.
You have the option of signing it and then sharing it with others, or you may store it in the Notes app for future reference.
When you are viewing a document, you may access the share sheet by tapping the share button, which is located in the upper-right hand corner of the screen.
Markup may be accessed by scrolling below the app shortcuts and clicking on it. Adding your signature will then be possible.
The markup tool has features that allow you to draw, write, add text, or upload a signature. Simply tapping the plus sign will reveal all of the available tool options.
When you are through annotating or signing the document, you have the option of sending it via email, saving it to the Files app, or treating it similarly to any other document that you may have on your iPhone or iPad.
Convert your iPhone into a mobile PDF scanner by following these steps. Using the Scan mobile app to scan in documents is a straightforward and easy process.
Simply proceed in the order presented below.
- Install Scan from the App Store and launch the app.
- Use the slider below the camera to select the document type you want to scan.
- Point your iPhone’s camera at the document. Scan automatically identifies the document’s edges and scans it.
- Tap Keep Scanning if you need to scan additional pages.
- Once you’re finished, tap Adjust.
- Adjust your scans — tweak the brightness, reorder and crop pages, clean and mark up documents, and more.
- Save your scanned pages as a new PDF file.
5 of the best free scanner apps for iPhone
1. Notes
It’s possible that this is the simplest way to get scanning done, but there aren’t many bells and whistles with it.
If you have an iPhone, are in desperate need of a PDF scanner, and do not want to download a new app, the Notes app that comes pre-installed on your iPhone can be used to scan documents.
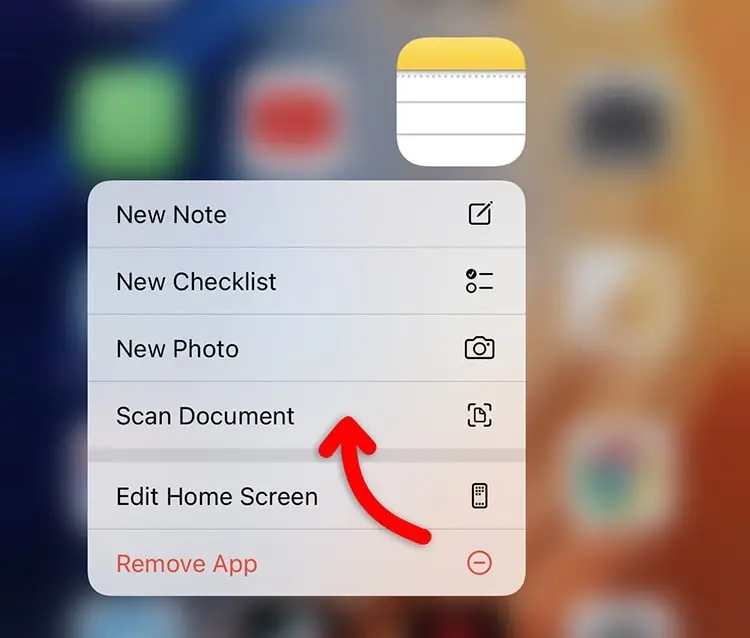
Simply select “Scan Documents” by tapping the camera icon, and then proceed with the on-screen instructions.
If you only need to perform a basic scan, then this is an excellent option for you; but, there are not many other capabilities available.
2. Adobe Scan
It’s possible that this is the simplest way to get scanning done, but there aren’t many bells and whistles with it.
Adobe Scan has a very intuitive interface, and users report that the scanned images look quite professional.
Your scans are automatically uploaded to Adobe Document Cloud (Opens in a new window), where they can be accessed from any device, including a computer, a smartphone, or a tablet. It does not cost anything, and it may be trusted.
3. Microsoft Office Lens
Adobe Scan is one of the most user-friendly and dependable choices available. Adobe Scan and Microsoft Office Lens are extremely comparable programs; however, Microsoft Office Lens is a better option if you are more familiar with Microsoft software. In addition to that, it is uncomplicated, dependable, and free.
4. CamScanner
You may scan documents, combine them, and access cloud storage services such as iCloud and Google Drive with the help of this free program.
However, the program does leave a little watermark on your scanned documents, thus it is possible that some documents would prevent it from working properly.
5. SwiftScan
SwiftScan is able to name files, send faxes, provide organizing tools, and access dozens of cloud storage providers, all of which are functions that are not available on other scanners.
The application is available for free on the iPhone, iPad, and Android platforms; however, the “Pro” upgrade, which costs $7.99, is what truly steals the show.
How to scan documents into PDF files on iPhone 2024:Newshub360.net
Related Post
Credit :www.Newshub360.net


