How To Download All Photos From Your Facebook Profile And Pages: Did you know that every day, people on Facebook post millions of photos?
If you are one of those users who has shared a lot of images over the course of the years, it is appropriate that it is time for you to clear out your albums.
But before you delete all of the images from Facebook and lose them for ever, it’s a good idea to download them first just in case you change your mind. That manner, each and every one of them will be contained within the same folder.
You won’t have to download each picture one at a time, which is a huge relief. This post will show you how to download all of the photographs at the same time, which is achievable.
Facebook receives massive amounts of information posted by users. You may quickly and simply post tens of thousands of images and videos to your Facebook account over time.
But what if, at some point in the future, you decided that you wanted to archive all of your images or even just preserve them before you deleted your Facebook account? Thankfully, there is a simple method to follow here. Continue reading to learn how to download all of your images from Facebook at once.
How to Download All Your Photos on Facebook
Facebook makes it easy for us to download all of our pictures at once by providing this functionality. Downloads of additional information from Facebook, such as messages, pages, reviews, and more, can be obtained by following the steps outlined in this procedure.
- Open Facebook using your default browser
You can also go to https://facebook.com/settings and skip to step 6
- Click the drop-down arrow on the top right

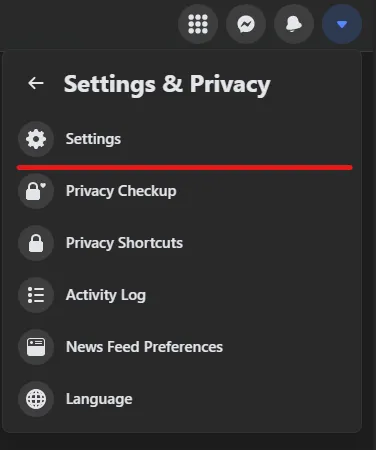
- Click Settings & Privacy
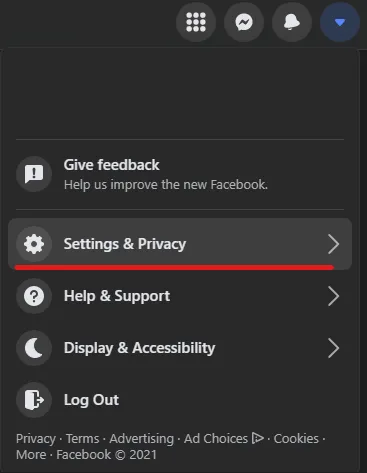
- Click Settings
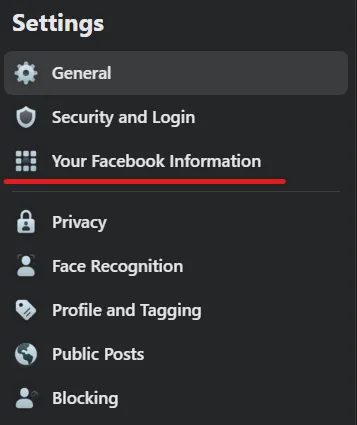
- On the left Sidebar, click Your Facebook Information
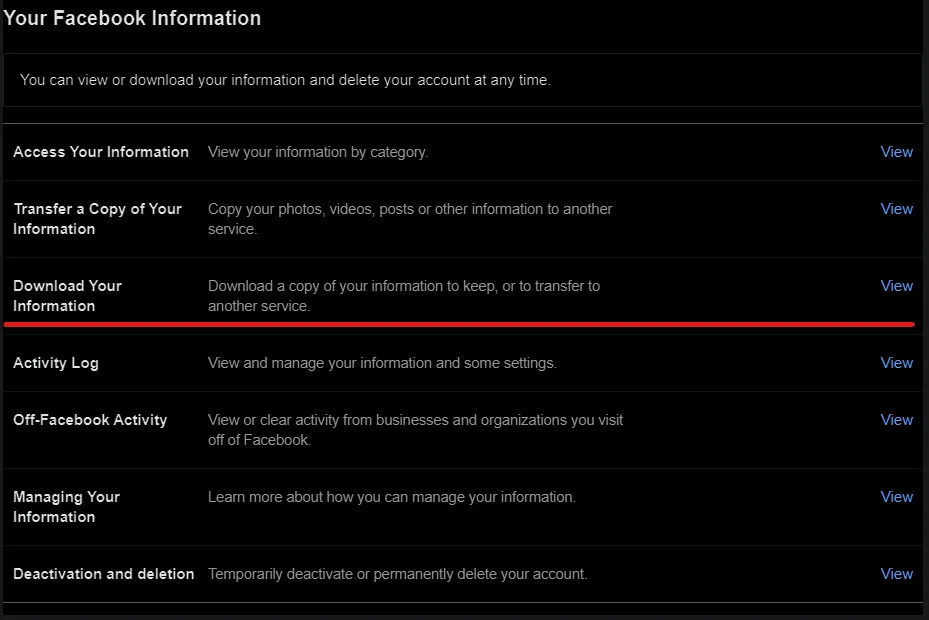
- Click Download Your Information
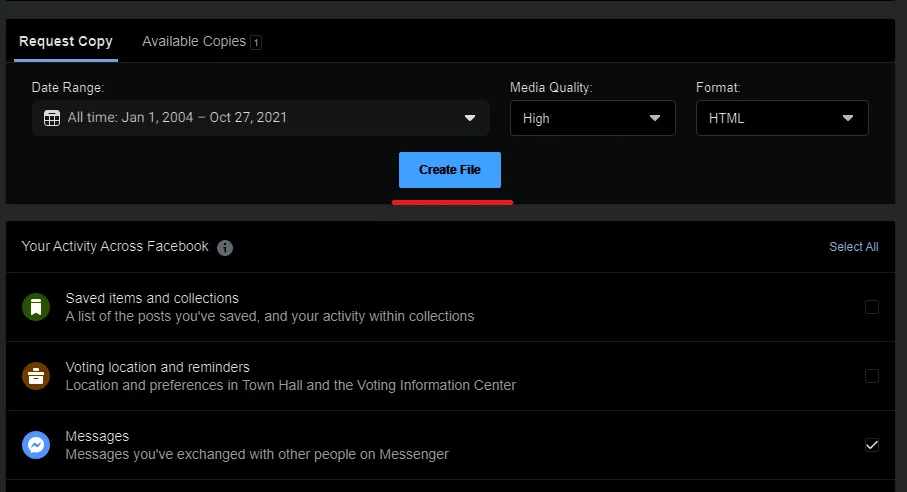
- Under Date Range, choose All Time or any date range you like
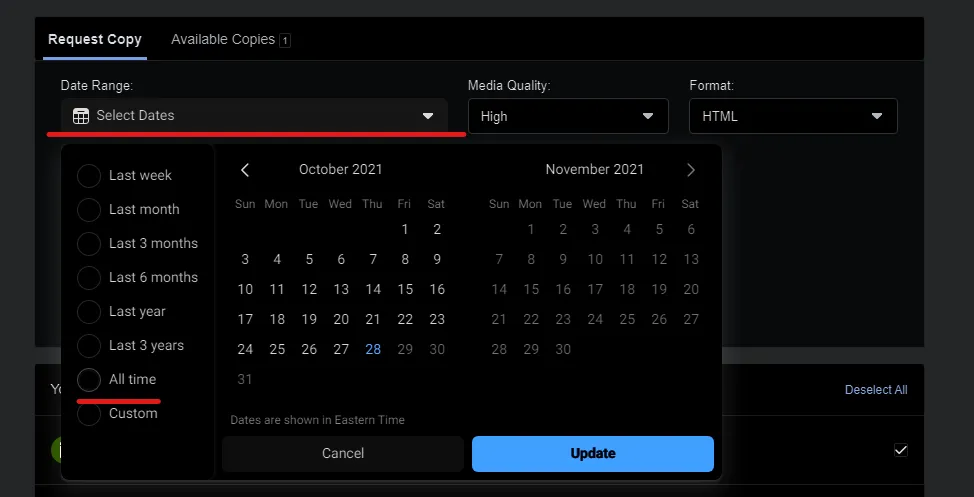
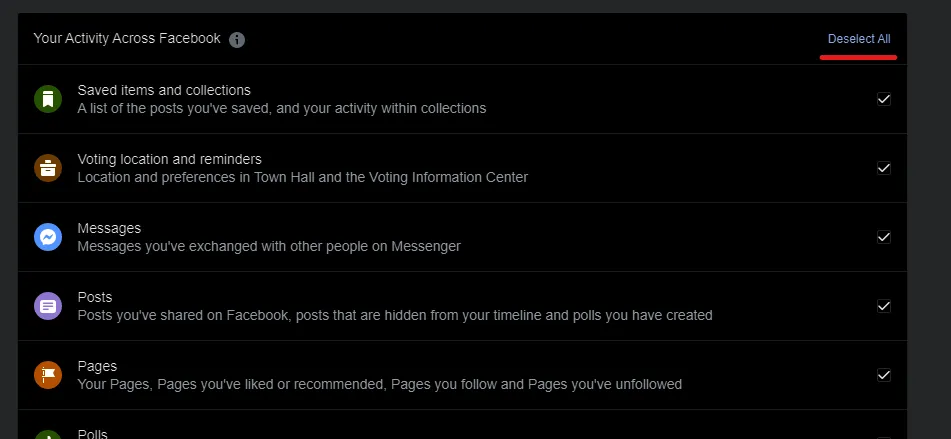
- On the right side, click Deselect All
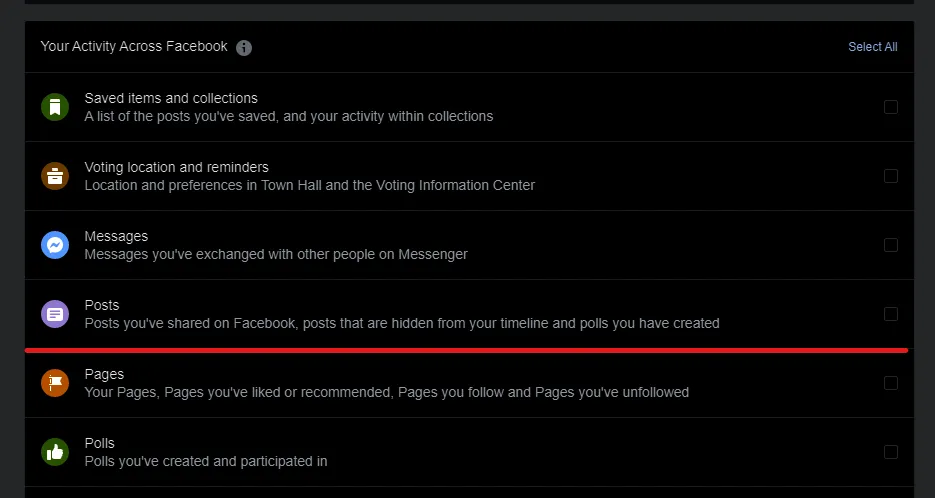
- Select Posts only
- Click Create File
Your files won’t be available instantly. Depending on how many files will be retrieved and the timeframe you picked, Facebook can take up to 30 minutes to put your files together.
Once your files are ready, you will receive a notification. Click the notification and then click Download. Please be aware that your file could be several gigabytes big. Your file will be in the form of a ZIP, and you will need to unzip the file to get to the individual photos inside. Once unzipped, you can see all of your photos inside the media folder.
If you need to redownload your ZIP file again, you can simply return to the same location where you created your file. On the top, click Available Copies. Click Download Again to redownload the file. This file will only be available for a specified period, typically a week, at which point it will expire. You can always follow the steps above to recreate the file.
You can follow similar steps to get all your photos using your mobile device but this is not recommended. Your download file will likely be very large and need to be unzipped. For these reasons, it is highly recommended that you download your files using the web version of Facebook.
How to Download an Album On Facebook
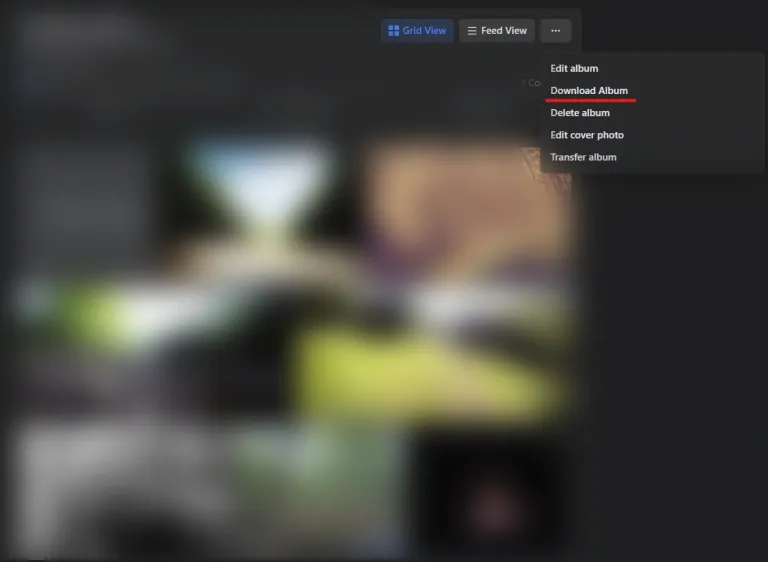
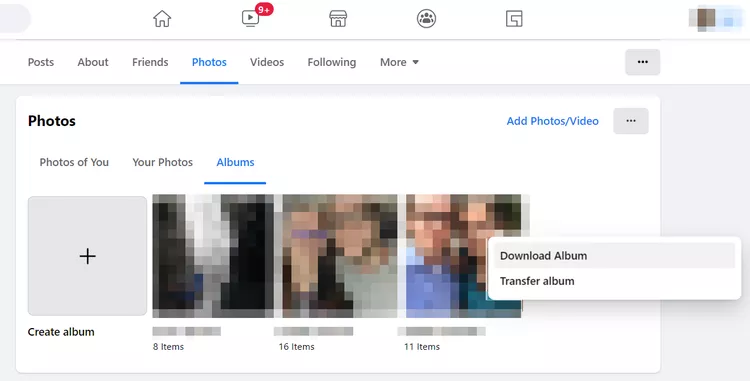
Sometimes you don’t need all of your photos but just an album. Facebook makes downloading albums very easy. Navigate to the album you would like to download and click the three dots in the top right corner. Click Download Album and you’re all set.
How to Download a Photo on Facebook
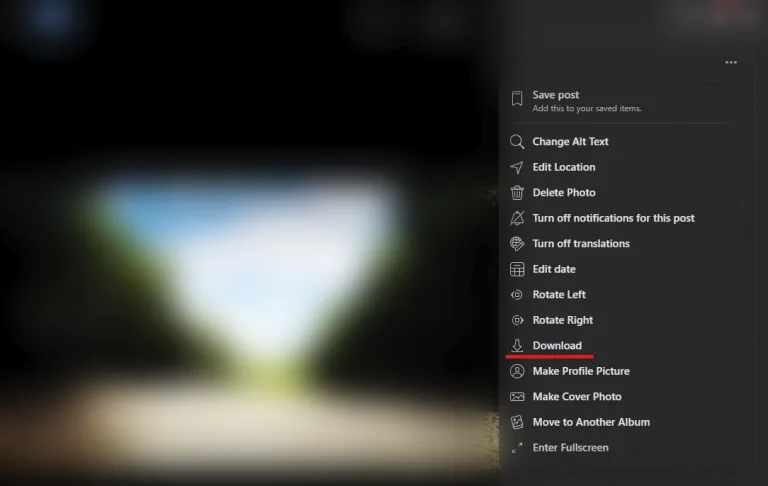
On the lowest level, we can also download just a single photo at a time. We want to follow this process to ensure that we download the highest-quality version of the photo. The steps are almost identical to downloading an album. Open the photo you wish to download and click the three dots on the top right corner. Then click Download.
How to Download All Photos From a Facebook Page using a Browser
You can only download all photos from the Facebook page for which you are the administrator. However, you will also have to download all other data to download all images and videos.
Essentially, you’re making a full copy of your page. That’s the only way it works on Facebook pages for now. Here’s what you do:
- In your News Feed, click on “Pages” on the left side of the window.
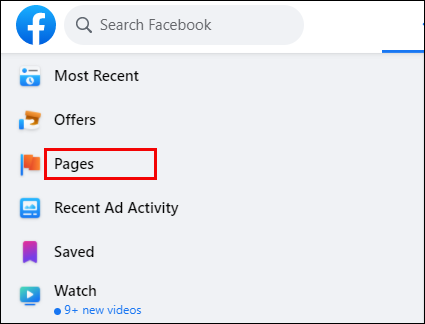
- Select your page and then choose “Settings.”
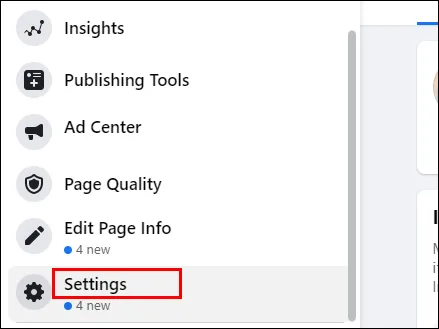
- Select “General” followed by “Download Page.”
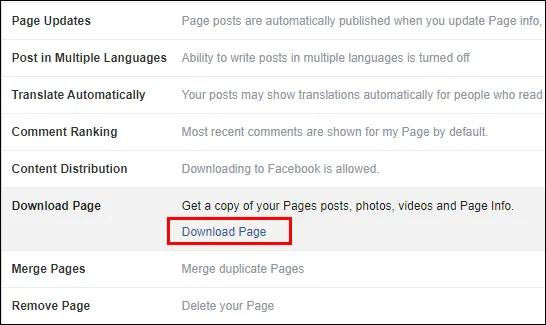
- Click “Create File.”

It might take a few minutes for Facebook to create a downloadable file. Once complete, you can save it to your device.
How to Download All Photos From a Facebook Group using a Browser
Unlike Pages, Facebook doesn’t allow data from groups to get extracted. There are several reasons why this could potentially be the case. Some groups have tens of thousands of members who want to protect their information.
On the technical side, extracting files from groups would create large files. Some browser extensions and add-ons can download separate albums from Facebook, but they don’t always work very well.
How to Download All Photos From a Facebook Profile using an iPhone
iPhone users also can download all photos from their Facebook profiles to their devices. Before you start, ensure that you have enough storage on your phone when it’s time to download the compressed file.
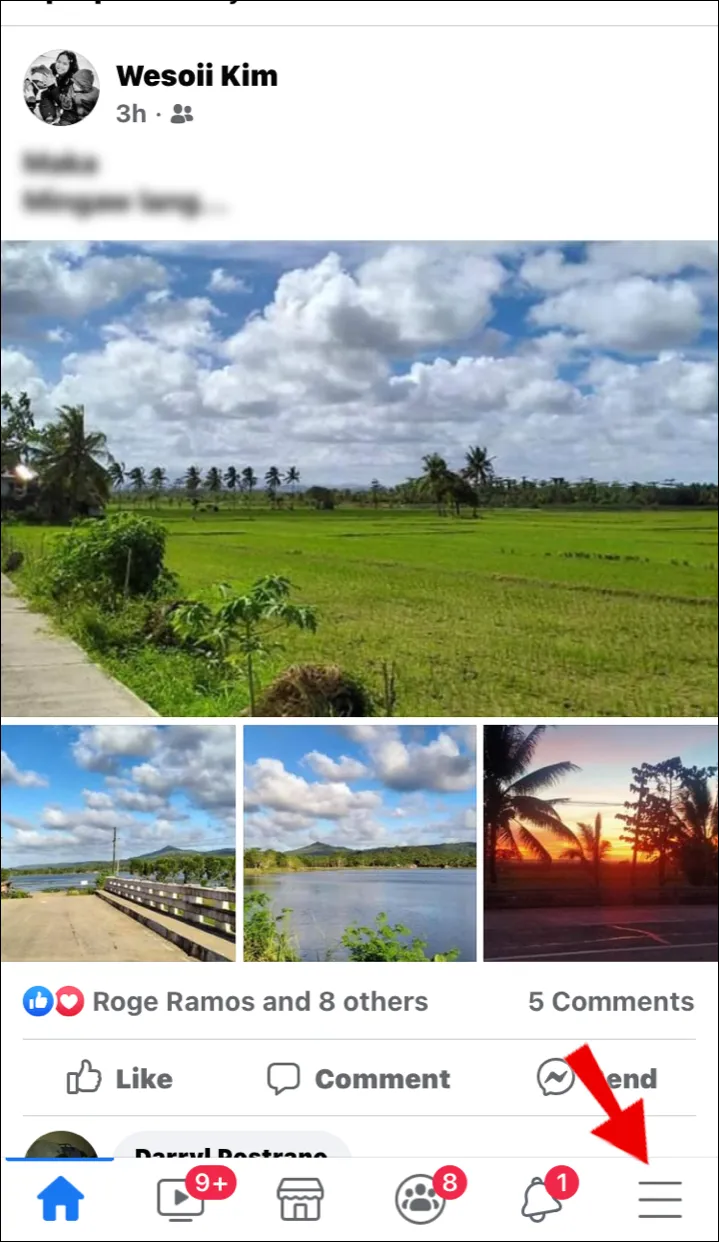
- Launch the “Facebook app” on your iPhone and tap on the “hamburger icon” in the screen’s bottom right corner.
- Select “Settings” and thengo to the “Your Facebook Information” section.
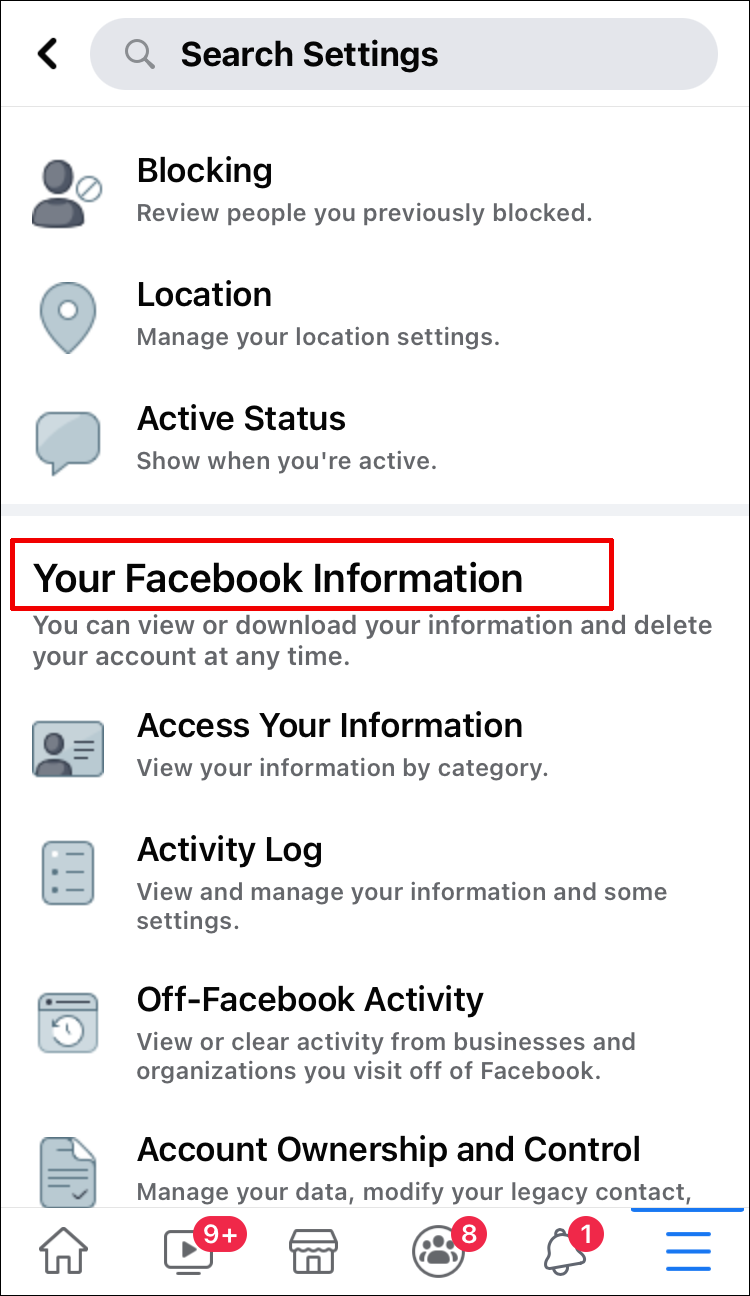
- Now, tap on the “Download Your Information” option.
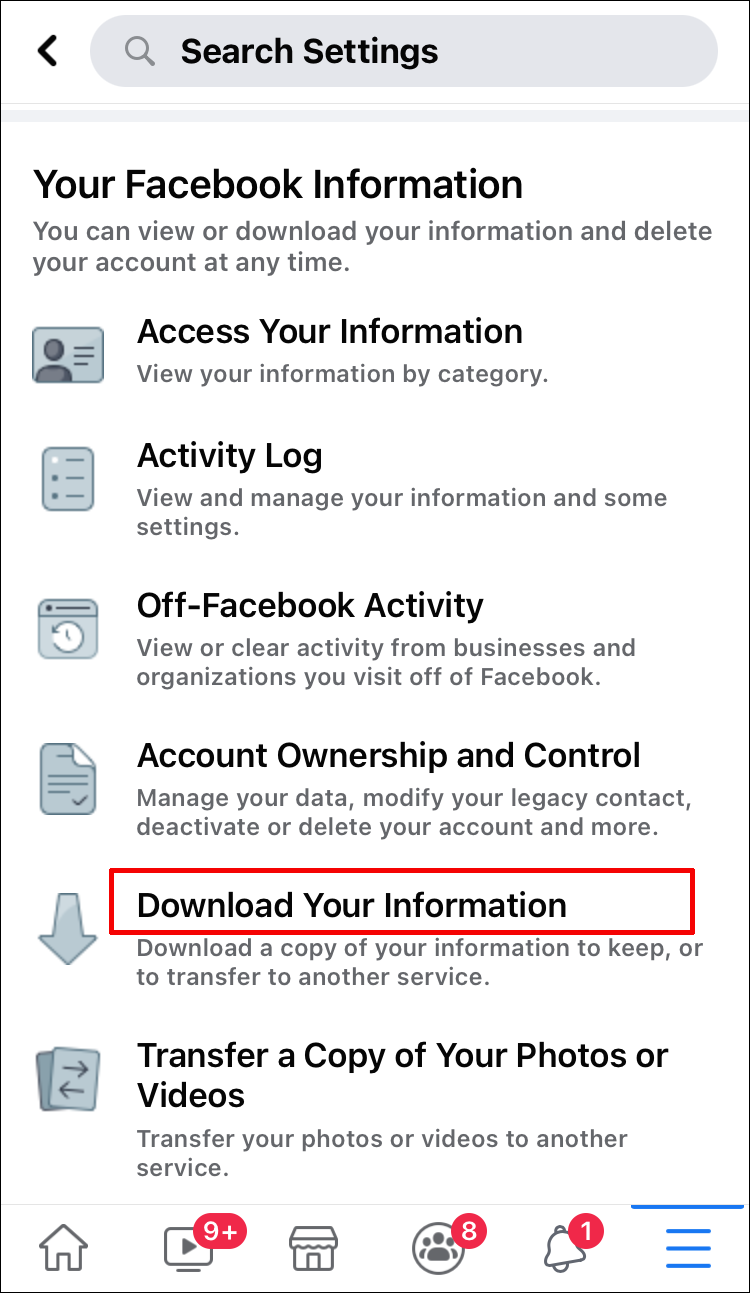
- Deselect all categories and tap on the “Photos and Videos” option.
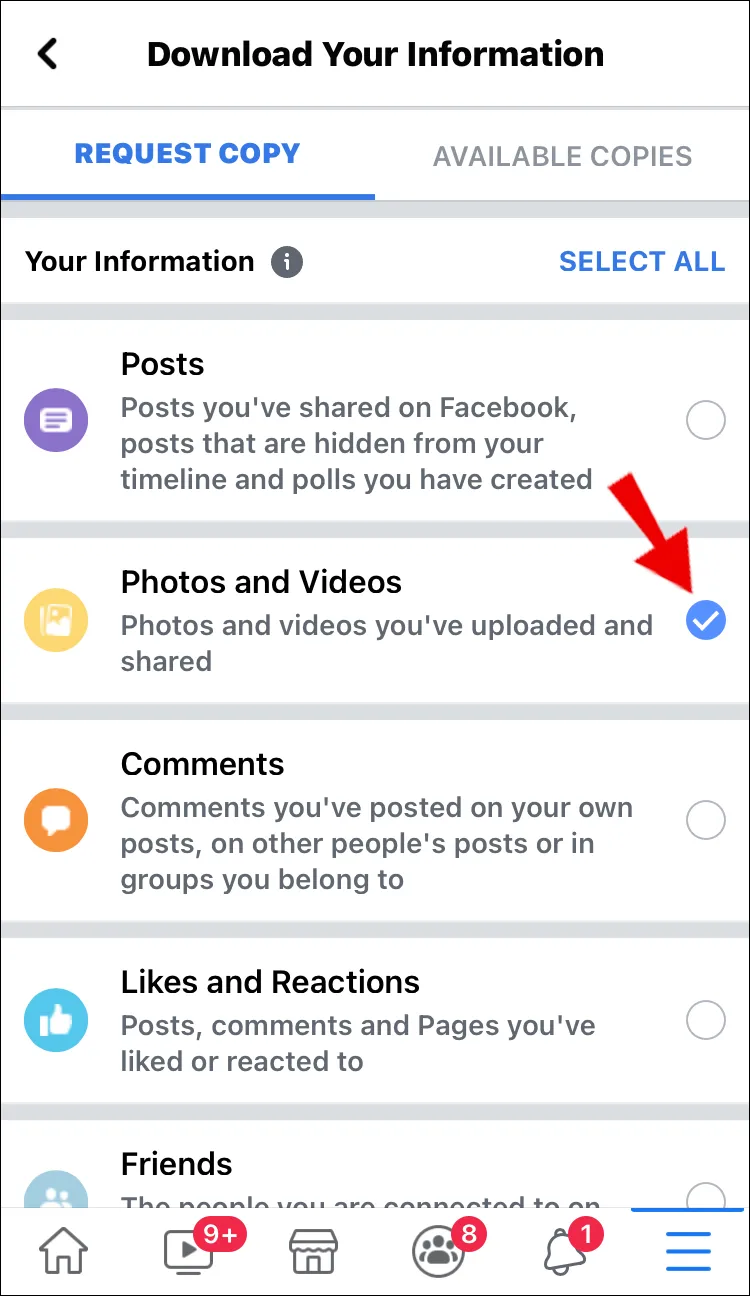
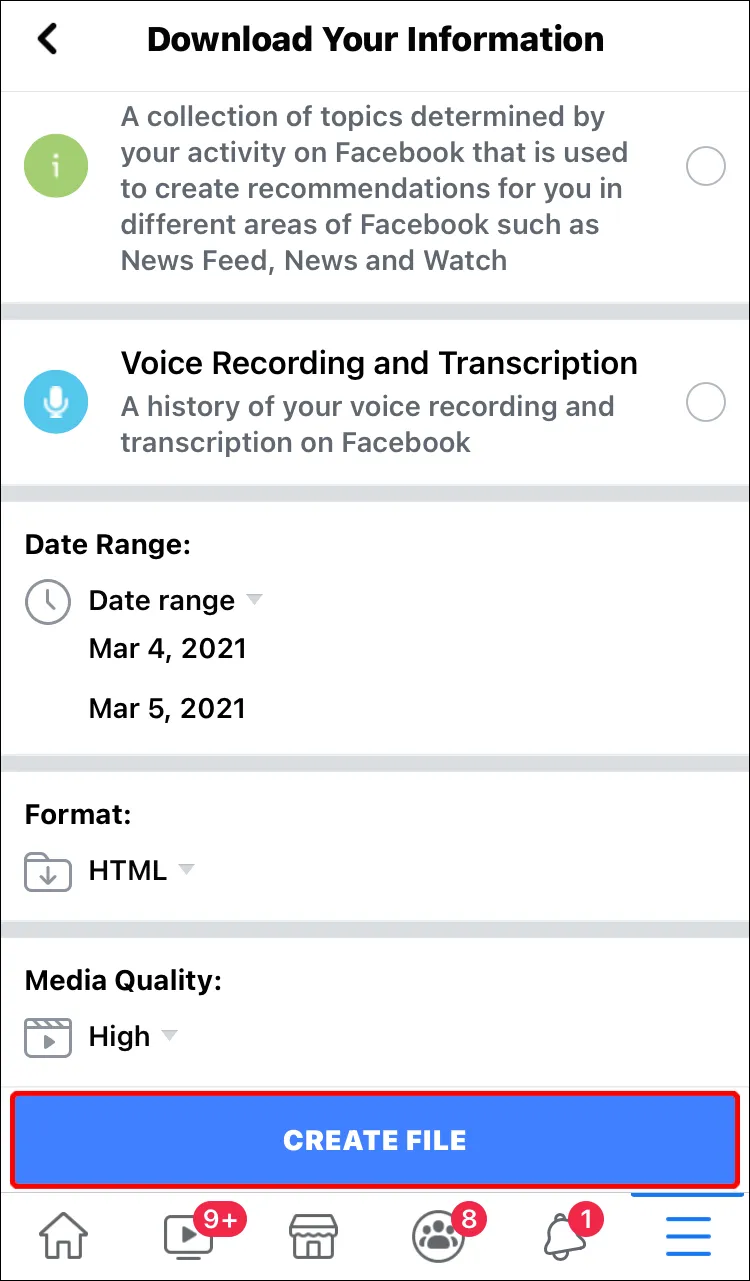
- Now, choose the date range, format, and media quality, then click on “Create File.”
- Wait until Facebook creates the file, then select the “Available Copies” tab.
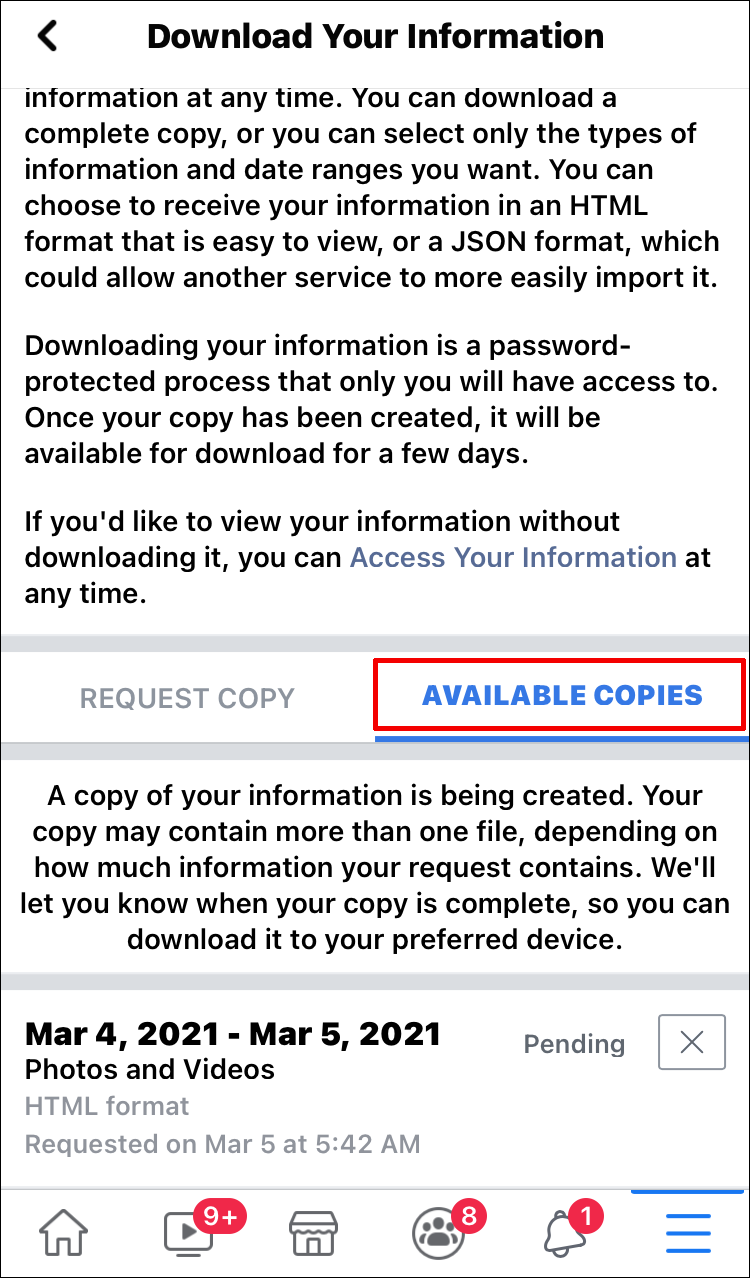
- Tap on the “Download” button, enter your password, and then click on “Continue.”
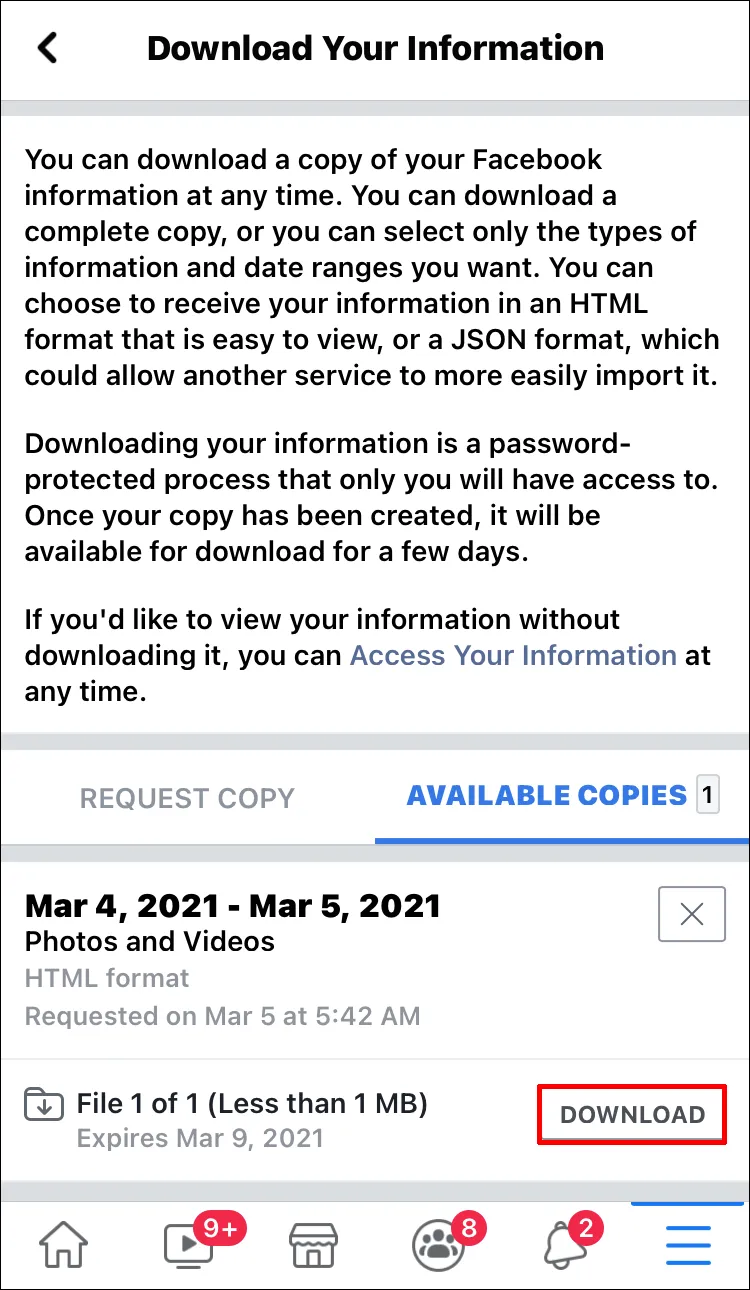
You can choose to save your compressed file to your iPhone camera roll or iCloud.
How to Download All Photos From a Facebook Profile using Android
Android users can also download all their Facebook photos in one compressed file. If you have an Android phone or tablet, here’s what you need to do.
- Open the “Facebook app” and tap the “hamburger icon” at the top right corner of the screen.

- Select “Settings” and then choose “Your Facebook Information.”
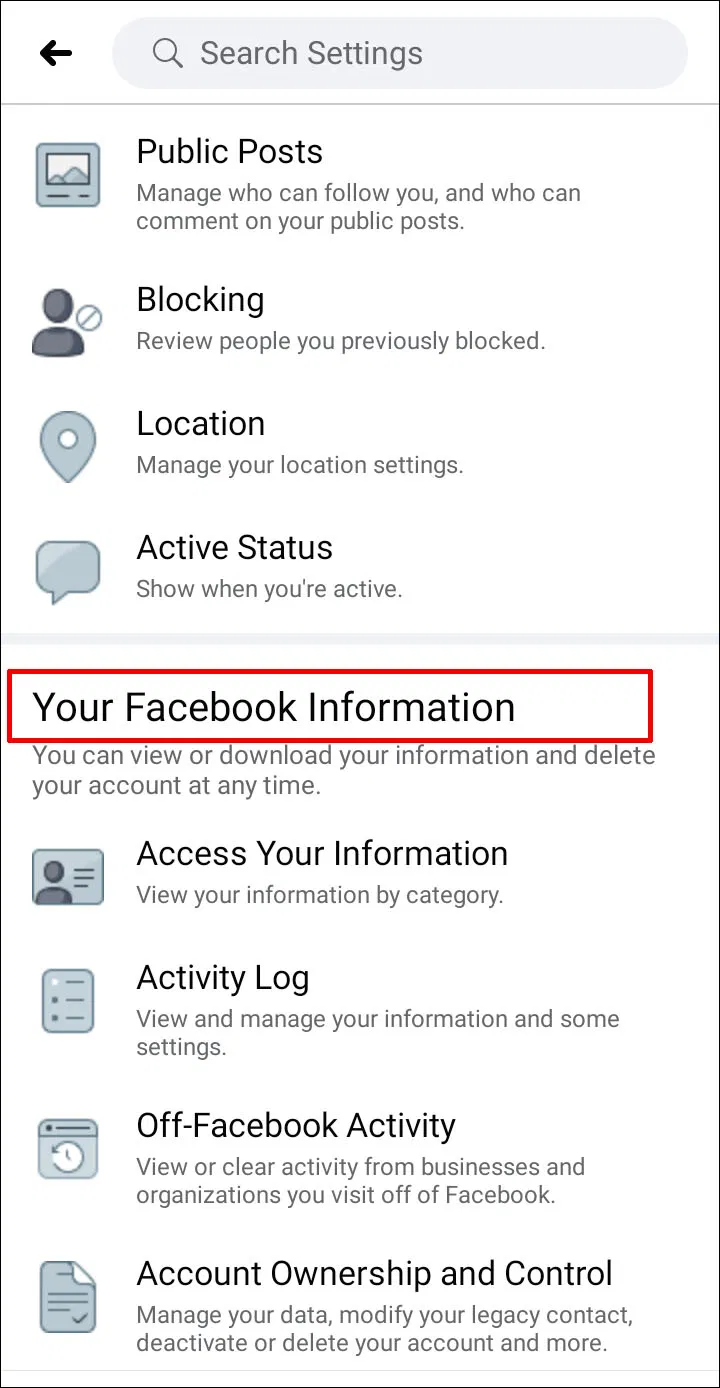
- Next, select “Download your Information.” Make sure to deselect all checked categories.
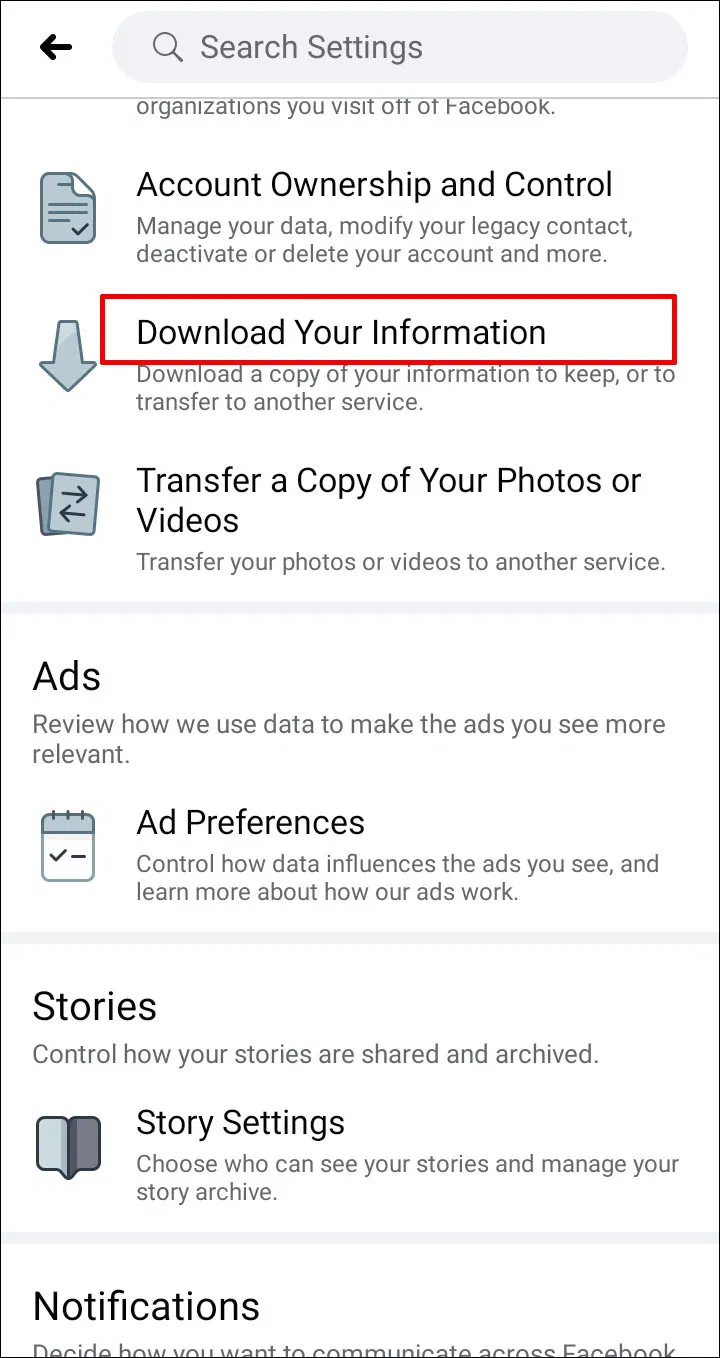
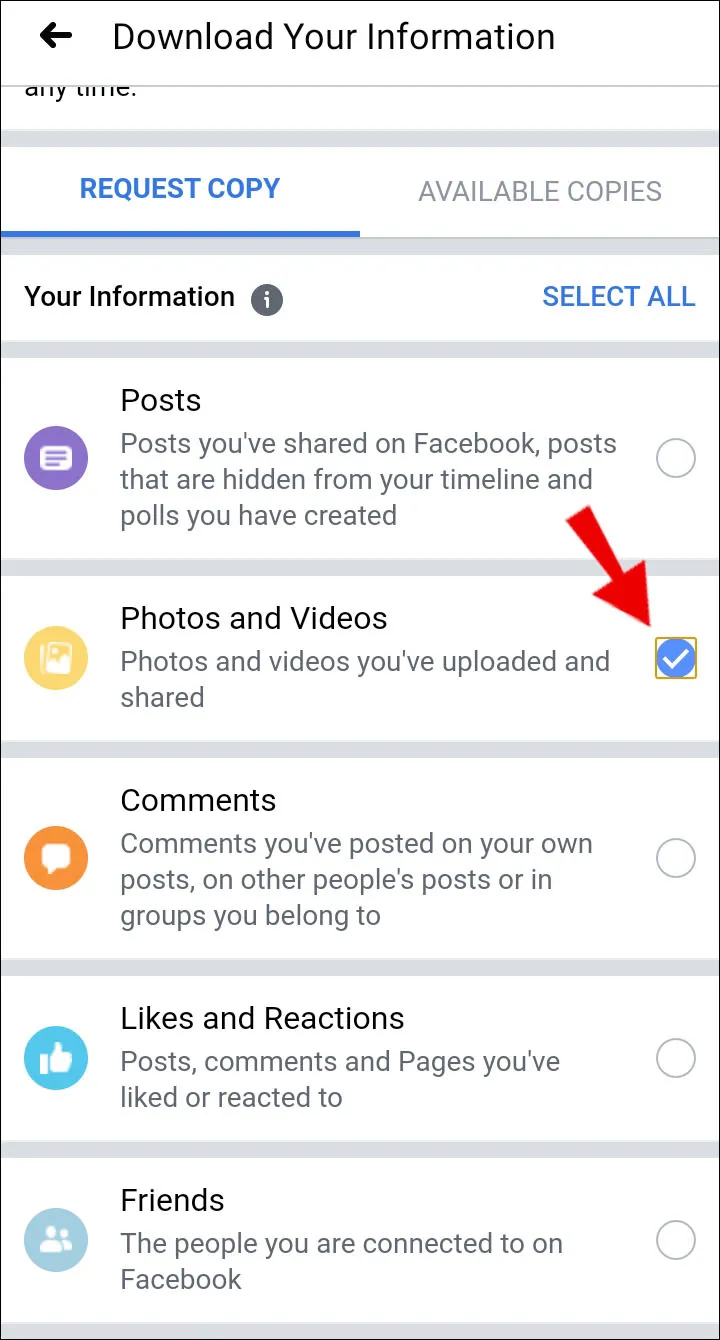
- Now, select “Photos and Videos” and proceed to choose the date range, file format, and media quality.
- Tap on “Create File” and wait for Facebook to gather all the media.
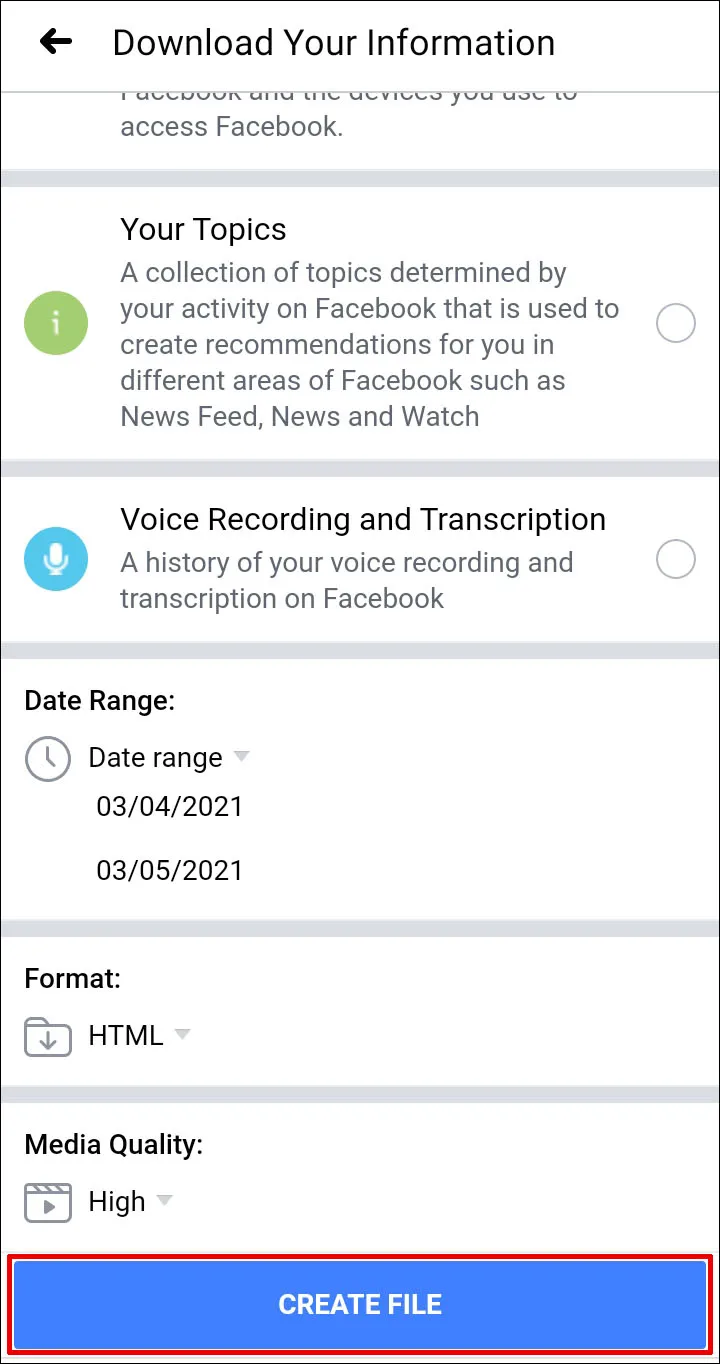
- When done, switch to the “Available Copies” tab and download your compressed file.

How to Download All Photos From Facebook Messenger
If you’ve already exchanged plenty of photos with your friends, you can’t retroactively download them all at once. You download them individually by tapping on the image and saving it to your device.
However, if you want Facebook image downloading to be an automated action in the future and avoid having to save the files manually, here’s what you can do.
- Open the “Messenger app” on your device and go to “Settings.”
- Select “Data & Storage.”
- Check the “Save Photos” box.
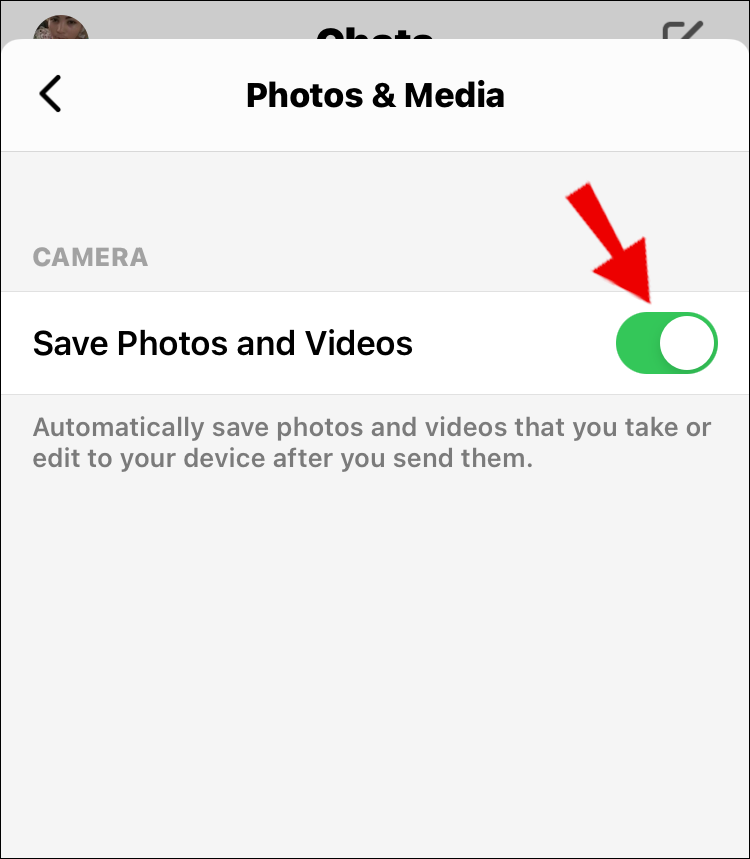
Once you have completed the above steps, your Messenger photos and images will automatically get saved to your device.
When to Download All Your Facebook Photos
You might wonder why you’d ever want to save all your Facebook photos to your computer instead of just keeping them online where they have been for years. There are different reasons for doing this, but the most likely is you’re cancelling your Facebook account.
You don’t have to lose all those precious memories you’ve stored in photos when you delete your Facebook account. In fact, Facebook provides a way to download all your pictures during the deletion process, because while folks might not want their Facebook account anymore, most want to keep their photos.
If you have no intention of deleting your account, you still might want to save all your Facebook photos to your computer if you plan to delete them from your account. Maybe you have some albums full of photos you no longer want your friends to see. Before erasing them, download them in bulk using the directions above.
Downloading a Single Album or Photo From Facebook
The instructions described above are not the only way Facebook lets you save your photos offline. In fact, that method is more than you need to complete if there are just a few pictures or albums you want to save.
For example, to save an album, find it in your account and use the menu button to find Download Album. Saving a single photo is similar; open it to its full size view, and use the three-dot menu to find the Download button.
If you’re using the mobile app, open the picture you want to download, tap the three-dot menu, and then select Save to phone.
How To Download All Photos From Your Facebook Profile And Pages – Newshub360.net
Related Post
Credit :www.Newshub360.net


